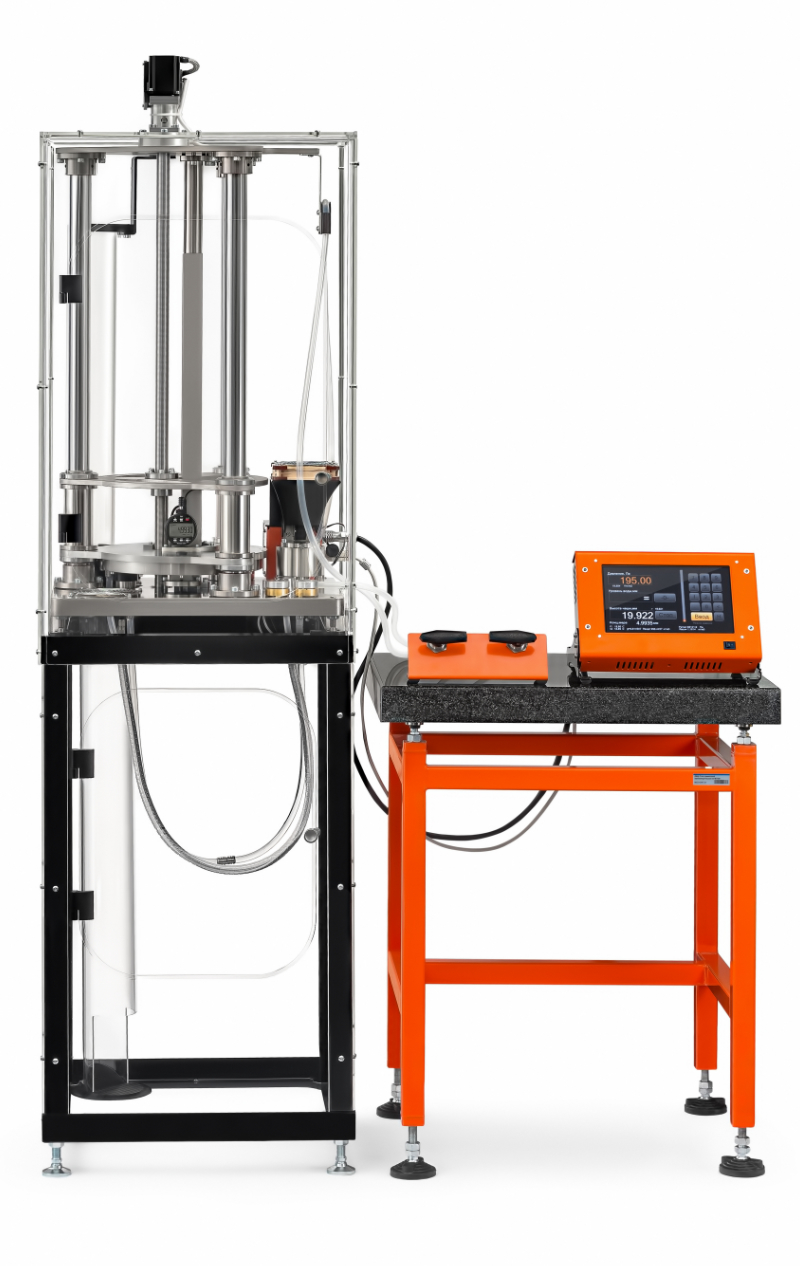
Micromanometer МКМ
Verification and calibration of high-precision instruments for measurement of pressure difference, excess and manovacuum pressure, such as pressure calibrators, pressure transducers (sensors), as well as draught and pressure gauges of accuracy classes 0.01 and coarser in the range from −5000 to 5000 Pa.
Advantages
Accuracy classes 0.005 and 0.01.
The unique pressure measurement principle: a compensatory method for measuring the height of a liquid column with a precision optical meter and a laser sensor.
Automatic liquid level control using a multifunctional touchscreen monitor.
Precision measurement of magnitudes of external factors (atmospheric pressure, temperature) and automatic correction of measurement results.
The shroud for protection against ambient air fluctuations.
The operating environment for verifiable instruments is air.
Description
The MKM micromanometer refers to liquid compensation instruments operating on the principle of communicating vessels, in which the difference in air pressure over the liquid of one vessel is compensated (balanced) by the pressure created by the column of liquid of another vessel. Distilled water is used as a working liquid.
In practice, pressure measurement is reduced to measuring the linear magnitude of the liquid column as well as accounting and adjusting readings in accordance with temperature and atmospheric pressure. Creation of the necessary liquid column in the MKM micromanometer is carried out by lifting a movable cup in relation to a fixed cup connected with the movable one by a tube Lifting of the movable cup is carried out by a ball screw rotated by an electric motor. The lifting magnitude of the movable cup is monitored by a precision optical meter. The required amount of movement of the movable cup is set from the control panel with a touch screen by specifying the pressure magnitude in different units. The required level in the fixed cup is maintained by a pneumatic device for pressure creation (pneumatic press). Switching the mode to pressure or vacuum is performed by a valve package which connects the upper cavity of one of the cups with a pressure generating device and connects the upper cavity of another cup with the atmosphere and vice versa.


Basic characteristics
| MKM-400 | MKM-500 | ||
| Upper range linit, Pa¹ | 4000 | 5000 | |
| Lower range linit, Pa¹ | 0,05 | ||
| Accuracy class | 0,005 (RMS 0,1 Pa); 0,01 | ||
| Operating environment | distilled water, air | ||
| Power requirements | 220 V/50 Hz | ||
| Maximum permissible error | |||
| as per accuracy class 0.005 | |||
| from 0.05 to 2000 (2500²) Pa | above 2000 Pa (2500²) | 0.1 Pa (abs.) | |
| above 2000 Pa (2500²) | 0.005% MV (rel.) | ||
| as per accuracy class 0.01 | |||
| from 0.05 to 2000 (2500²) Pa | 0.2 Pa (abs.) | 0.25 Pa (abs.) | |
| above 2000 Pa (2500²) | 0.01% MV (rel.) | ||
Documentation
Datasheet PDF 1,020 MB- 1. Measuring unit
- 2. Control panel with valve package
- 3. Pneumatic pressure generating device
- 4. Accessory kit
-
length560 mmwidth490 mmheight2010 mm
-
length485 mmwidth265 mmheight500 mm
-
length500 mmwidth400 mmheight240 mm